
This is my very first tutorial, and tonight I am proud to post it (mostly because I finally learned how to do a screen shot in Photo Shop!) That is something I have wondered how to do for a very long time. Some of my friends who don't have as much time as I do have asked " How did you make that?" Well, I can say its never really planned out how the final paper will really look. Most of it is just playing around! I may have to go back and edit this tut. as well. I welcome your feed back!
Some established artist may design differently, but since I am a self taught crafty kinda gal, I just thought I would share with you how "I" do this. For the life of me though, I have no idea why so much of this is showing as a link, so it will have just do as shown.
First, I pull up a new canvas the color I want it to be. ( Or, you can just start with a white back ground and duplicate or make a new layer and then fill that in).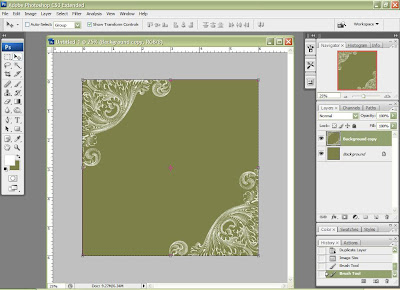 OK, as you see I have duplicated my first layer and filled it in with green. Now, I open my brush pallet and make a few strokes on each corner. ( You can choose a new layer if you desire, to put in the new brush strokes.) Here is what my brush window looked like. Notice in the next screen shot, the little checks are checked so I can rotate my brush for the corners.)
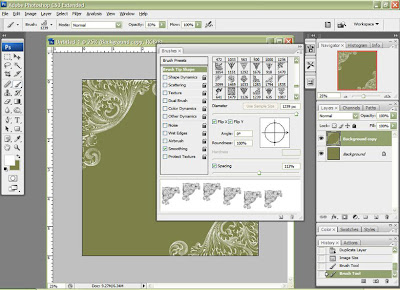 When you are happy with your brushes designs, you are ready for the next step. I added a new layer and chose a grungy brush to rough up the canvas a bit.
Next, I search for a texture. I chose a light colored rock . This is where the fun starts.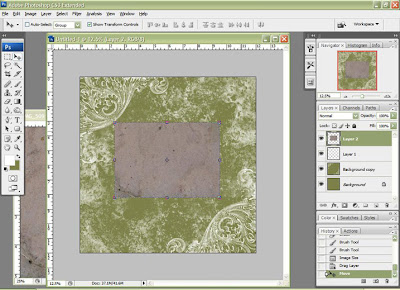 With your move tool, drag it onto your canvas. I put it on top of all the other layers, since I want the brush strokes to be a little less blunt. Now stretch your texture over the entire canvas, covering all of the layers.
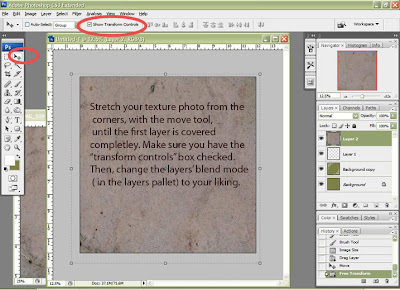
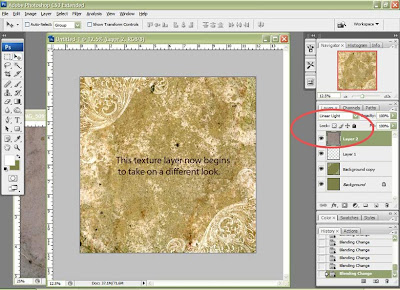 Then, change the blend mode of that layer.( see right above here.) I usually scroll through all of the blending modes to see what look it may take on. Oh, the many choices! I could stop here, but if the night is young and I still want to play, I add a gradient to the background copy layer by opening the fx at the bottom of my layer pallet.
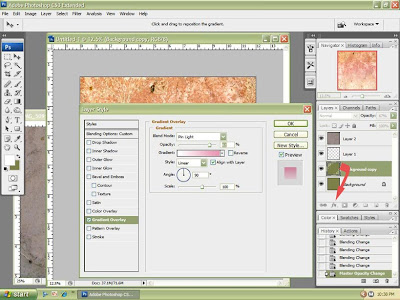 I felt like pink, so I applied that.
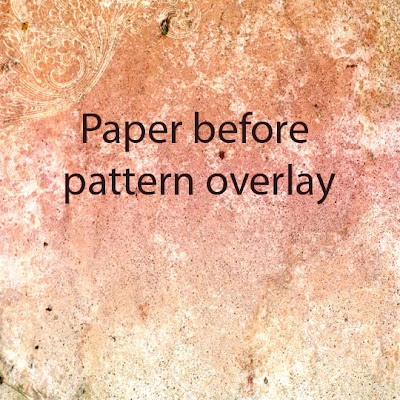 I saved this paper as is, since I thought it would make a pretty cool blog topper.
And then, I duplicated this, and added a pattern.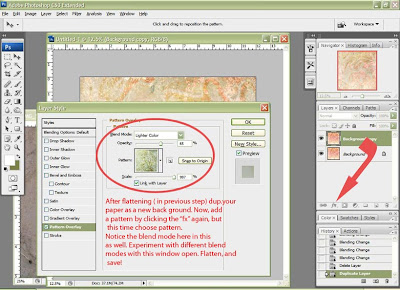 To do this, click on the little fx again, and choose "Pattern overlay." I searched my patterns and applied a new one I made this week. Change the blend mode in the new pop up window as well as the opacity, until you are satisfied.
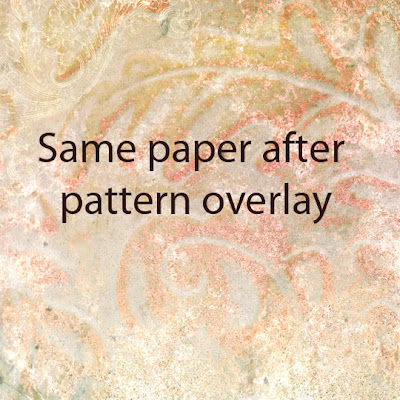 I now have 2 different papers to add to my collection!
You can have them too, by late tonight, after Iupload them and post the link.
Ok, so how did I do?( I mean on the tutorial.) How can I improve? How do my screen shots look? Now that I can do that, or Those, I just may post a tutorial on how to make brushes. If you don't see me soon, that probably means IM editing a new session, ( And that is a good thing!)
Thanks for stopping by!
Here are links to the two papers:File name: 1212PaprDezne.jpg
Download link: http://www.mediafire.com/file/yzmmoanidzm
File name: 1StepFurther1212.jpg
Download link: http://www.mediafire.com/file/noywyzjhkd2
 OK, as you see I have duplicated my first layer and filled it in with green. Now, I open my brush pallet and make a few strokes on each corner. ( You can choose a new layer if you desire, to put in the new brush strokes.) Here is what my brush window looked like. Notice in the next screen shot, the little checks are checked so I can rotate my brush for the corners.)
 When you are happy with your brushes designs, you are ready for the next step. I added a new layer and chose a grungy brush to rough up the canvas a bit.
Next, I search for a texture. I chose a light colored rock . This is where the fun starts.
 With your move tool, drag it onto your canvas. I put it on top of all the other layers, since I want the brush strokes to be a little less blunt. Now stretch your texture over the entire canvas, covering all of the layers.
 Then, change the blend mode of that layer.( see right above here.) I usually scroll through all of the blending modes to see what look it may take on. Oh, the many choices! I could stop here, but if the night is young and I still want to play, I add a gradient to the background copy layer by opening the fx at the bottom of my layer pallet.
 I felt like pink, so I applied that.
 I saved this paper as is, since I thought it would make a pretty cool blog topper.
 And then, I duplicated this, and added a pattern.
 To do this, click on the little fx again, and choose "Pattern overlay." I searched my patterns and applied a new one I made this week. Change the blend mode in the new pop up window as well as the opacity, until you are satisfied.
 I now have 2 different papers to add to my collection!
 You can have them too, by late tonight, after Iupload them and post the link.
Ok, so how did I do?( I mean on the tutorial.) How can I improve? How do my screen shots look? Now that I can do that, or Those, I just may post a tutorial on how to make brushes. If you don't see me soon, that probably means IM editing a new session, ( And that is a good thing!)
Thanks for stopping by!
Here are links to the two papers:File name: 1212PaprDezne.jpg
Download link: http://www.mediafire.com/file/yzmmoanidzm
File name: 1StepFurther1212.jpg
Download link: http://www.mediafire.com/file/noywyzjhkd2


No comments:
Post a Comment